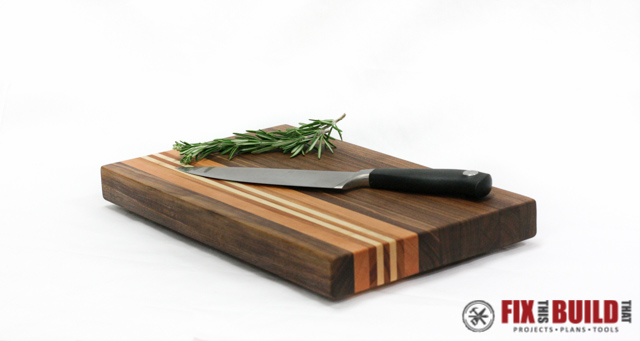
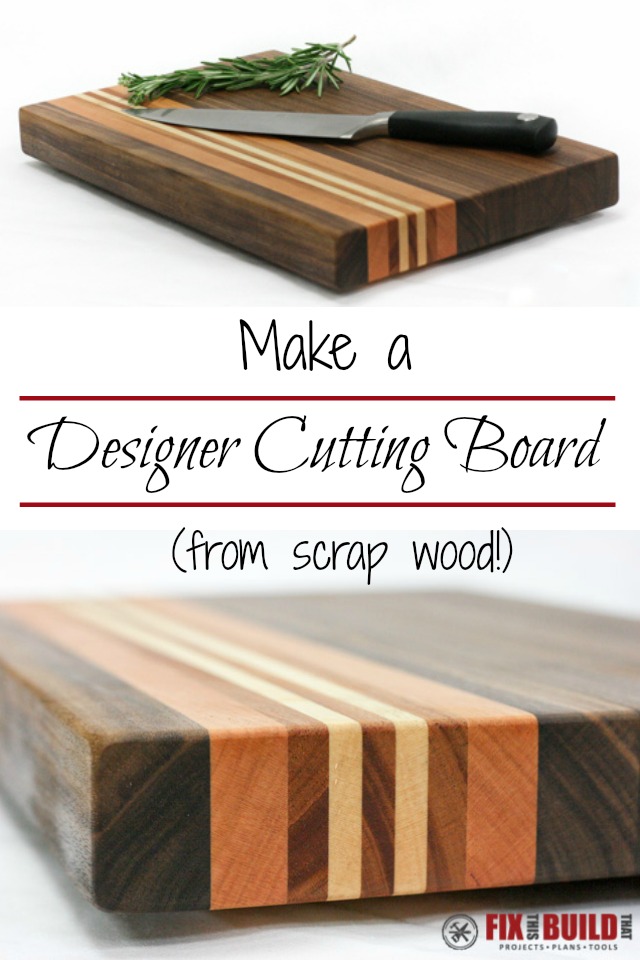
Today I’m going to show you how to make a cutting board from any wood. I’m using leftover scraps as it’s a great use for those skinny odd length offcuts you have hanging around your shop. Depending upon the scrap wood that you have, the design possibilities are endless, and of course you can buy wood specifically for the project to get exactly what you want.
I’m making a thick edge grain board today, but you can also make face grain and end grain boards with all kinds of designs. I now also have a post on How to Make an End Grain Cutting Board that you can check out as well.
Affiliate links are used on this page. See my disclosure page for info on affiliate programs.
You can make a cutting board in 5 easy steps
1. Prep the Stock for the DIY Cutting Board
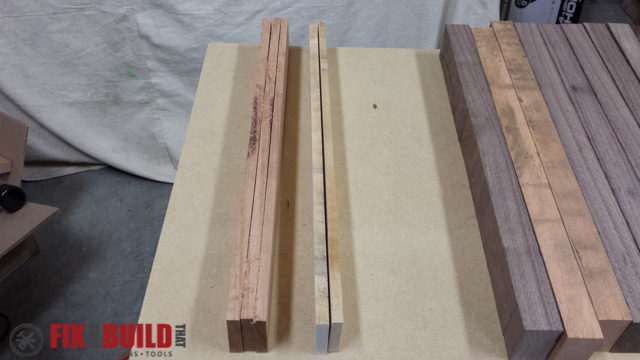
These are the outcast boards I wanted to find a use for. I had 2 long offcuts, one of cherry and one of walnut. Then I had a thicker piece of mahogany and a small scrap of maple. All the boards were about 1″ thick and all but the maple were at least 1-3/4″ wide. Perfect for making a cutting board!

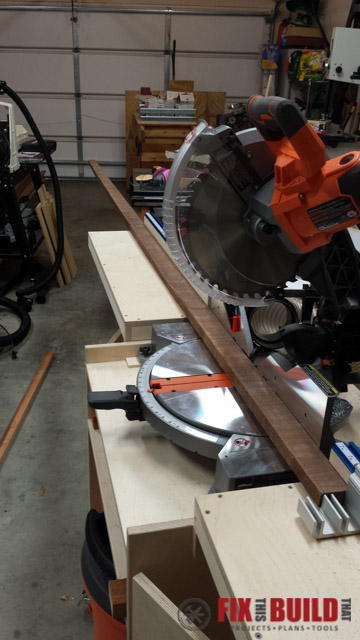
The maple piece was 16″ long, so the first thing I did was to cut everything to 16″ chunks. I used my Mobile Miter Saw Station for this and just set the stop block at 16″ and went to town. Use whatever size you have available or the size you want your boards.
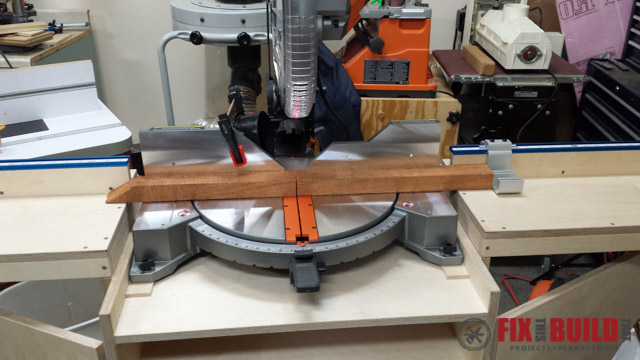
The side supports on the Miter Saw station really came in handy on the 10′ walnut piece!
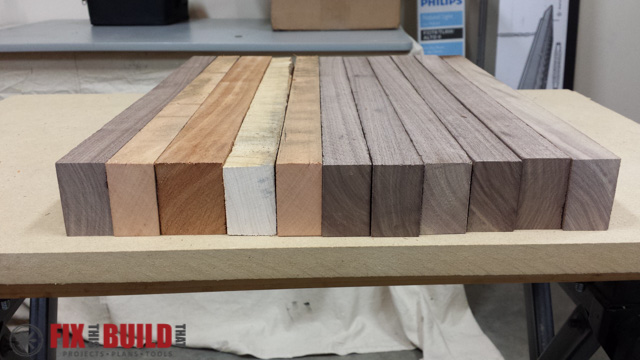
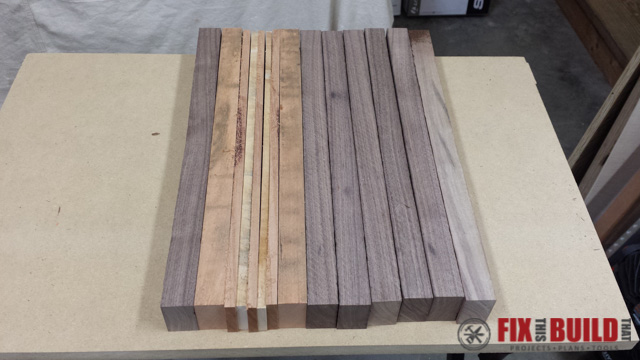
Lay out the cut pieces and start thinking about what kind of design you want when you’re making a cutting board.
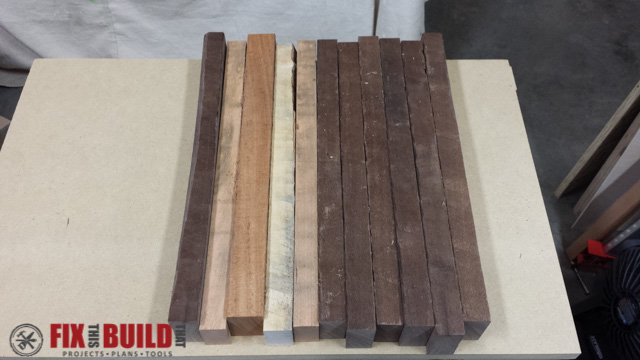
Next make all the pieces approximately the same width. I set my table saw to 1-7/8″ (a little wider than the smallest piece of maple) and ripped all the boards down to that size. Again, use whatever width you have. I recommend staying above 3/4″ to keep away from warping.

2. Layout the Cutting Board Design
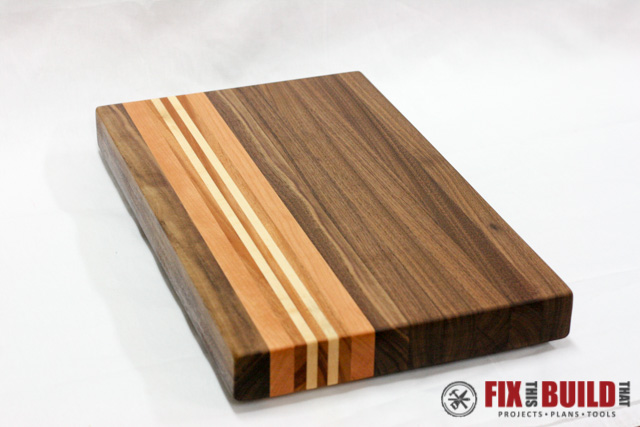
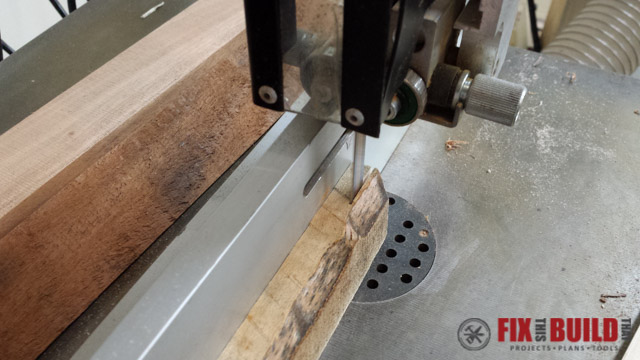
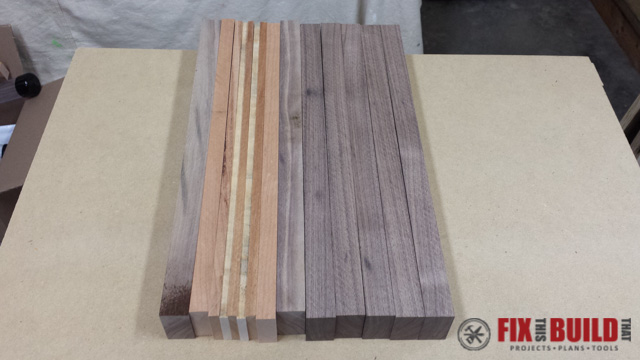
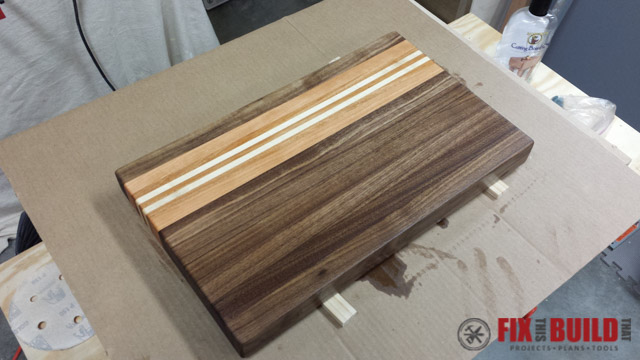
For my cutting board design I wanted to have full sized walnut pieces with stripes of accent wood on one side. For small strips, use a bandsaw or table saw to cut the scraps downs. I went with 2 small strips of maple and 3 strips of mahogany.
3. Glue Up the Wooden Cutting Board
Now is the part I get the most questions about, the cutting board glue up. I use Titebond II when making my cutting boards. That’s all you need to hold things together. No dowels, no biscuits, just the wood glue.
Lay the boards on your clamps with some clamping cauls between the end boards to be glued and the clamp faces. This helps keep dents off the finished cutting board and spreads the pressure evenly.
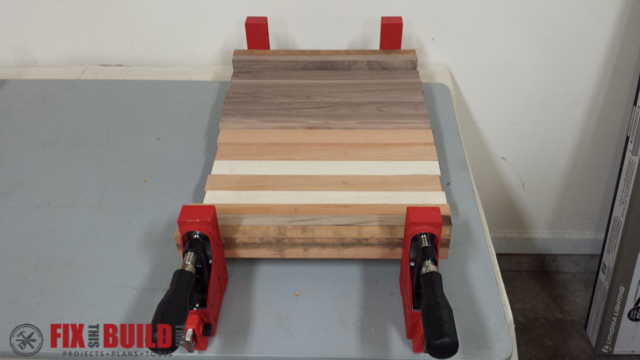
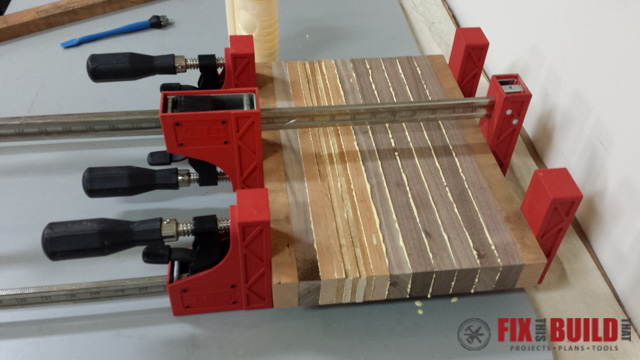
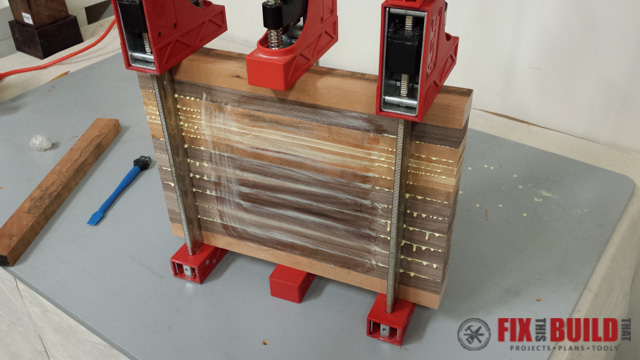
Flip the boards over one by one and put glue on one the planed faces and then stand it back up against the other pieces. Using a glu-bot bottle and glue brush save some time here. Make sure as you tighten down the clamps you adjust the boards as needed to keep them flat and even. Here is what the final clamped glue up looks like.
4. Final Shape the Cutting Board
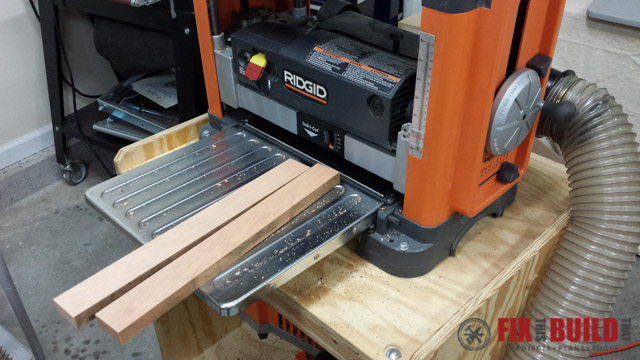
Take the cutting board out of the clamps and send it through the planer using a skip-planing method. That’s a fancy way of saying flip the board end for end at each pass. Do this until you have fresh smooth wood on each face.
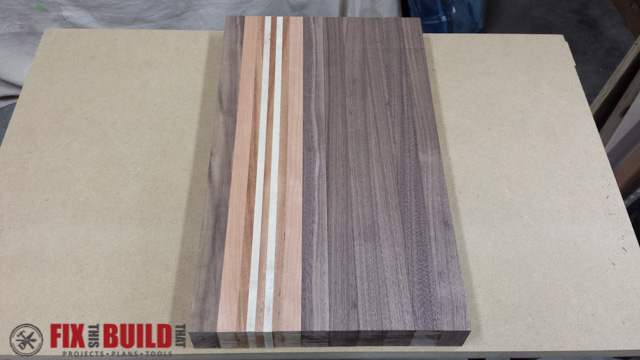
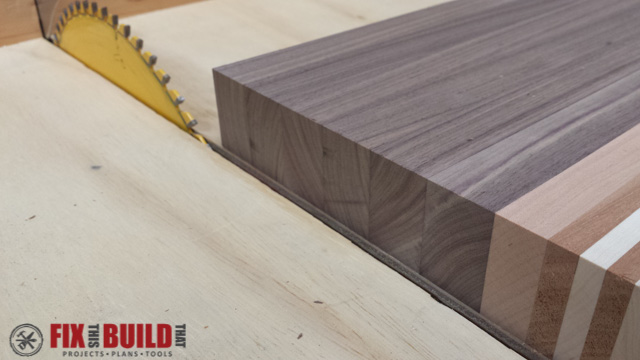
Trim the ends of the cutting board to make them clean and get your final size. I used a crosscut sled on my tablesaw for this.
If you want to put a decorative edge on your cutting board then do that now using a roundover bit in a router. I prefer a very small roundover on my cutting boards that I mostly do by hand, but sometimes I’ll go with a chamfer if I’m feeling macho that day.
5. Sand and Oil the DIY Cutting Board
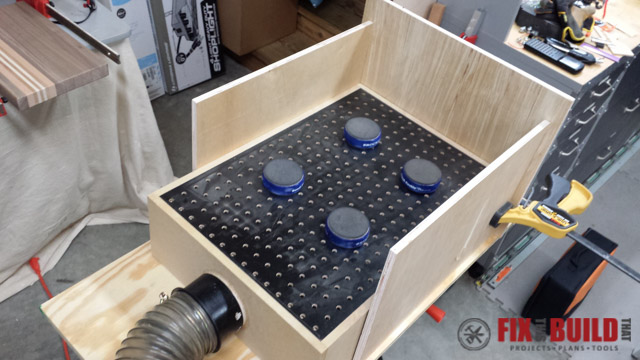
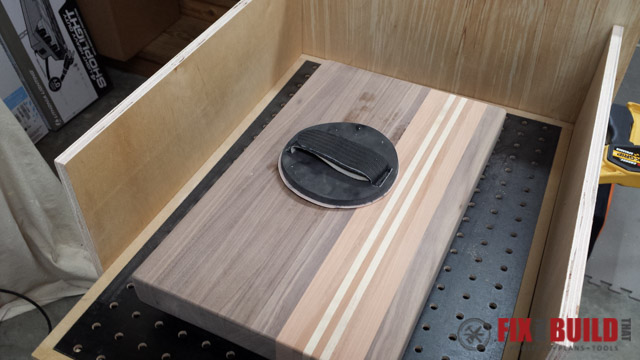
Now it’s time for sanding…ugh. This is the sanding station I use when I’m making a cutting board. It’s a Downdraft Sanding Table Box I have plans for, so check it out if you want dust free sanding.
I start at 100 grit and work my way through 150, and 220. At 220 I spray the whole cutting board down with water and wipe it off. This is known as “raising the grain”, and basically you are making the cut wood fibers stand up so you can knock them down for a smooth feel. If you don’t do this then the first time you wash your cutting board it will feel very rough.

After the cutting board dries, hand sand it lightly with 220 until it feels smooth again. Wet the cutting board one more time and hand sand with 220 again. Now when you wet the board after use it will still feel smooth to the touch.
And now for everyone’s favorite part of making a cutting board, applying the finish. I almost always use straight mineral oil followed by a beeswax and mineral oil blend. Nothing special for the first coat, just any ole mineral oil you can get at the drug store or grocery. Pour on a big puddle of mineral oil, then sit and stare at it. No seriously, you are going to be mesmerized by how amazing your cutting board looks.
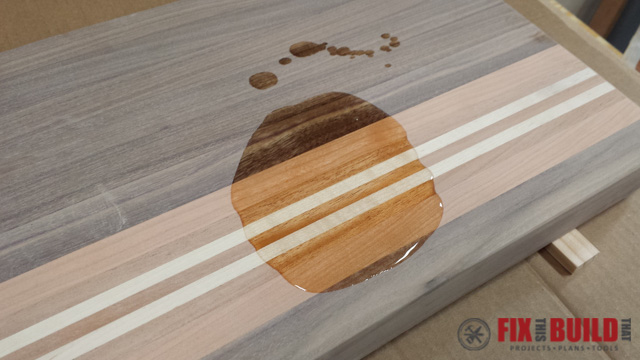
Okay, now snap out of it and spread the oil around. Let it sit for about 5 minutes then wipe off any excess. Repeat this process with 1 more coat until the board is nice and saturated. Then I top my boards with a beeswax and mineral oil blend that helps with extra water protection and lets you buff your DIY cutting board to a nice sheen.
Oil the board whenever it starts looking dry by just applying more mineral oil. The rule of thumb is to do it once a day for the first month, once a week for the next month, and once a month there after. I totally don’t do that. If it looks dry, I put more oil on it
And that’s it! Now you know how to make a cutting board out of any type of wood. You can add feet, hand holds, juice grooves and all types of other things to cutting boards, but I like them simple. I leave the feet off because then you can use both sides.
I also have posts that show you how to make an end grain cutting board and a curved cutting board using bent lamination. If you build a board post a pic of it in the comments so I can see it!
Signup now to get an email when I publish new content.
FixThisBuildThat will never give away, trade or sell your email address. You can unsubscribe at any time.
Original article and pictures take http://fixthisbuildthat.com/how-to-make-a-cutting-board/ site
Комментариев нет:
Отправить комментарий